

Every day, thousands of new websites go live. Linux, in addition to being an open source and user-friendly distribution, is the default option for many people for a variety of other reasons. Perhaps you are a developer, a student, or an administrator, and you have just completed the installation of your first Linux server.
Maybe you’ve also been learning about the latest hacks and scams happening and want to learn what steps you can take to prevent yourself from being in the shoes of the victim as these hacks mostly occur due to improper configuration of the server and other items.
Then you are in the right place. This blog post is dedicated to how to secure your Linux Server. This is going to be a generic article, so that it fits all the purposes be it for your personal work or office/profession related work. So, let’s go over a few common mistakes that we are likely to make.
Securing the Linux Server with these best practices
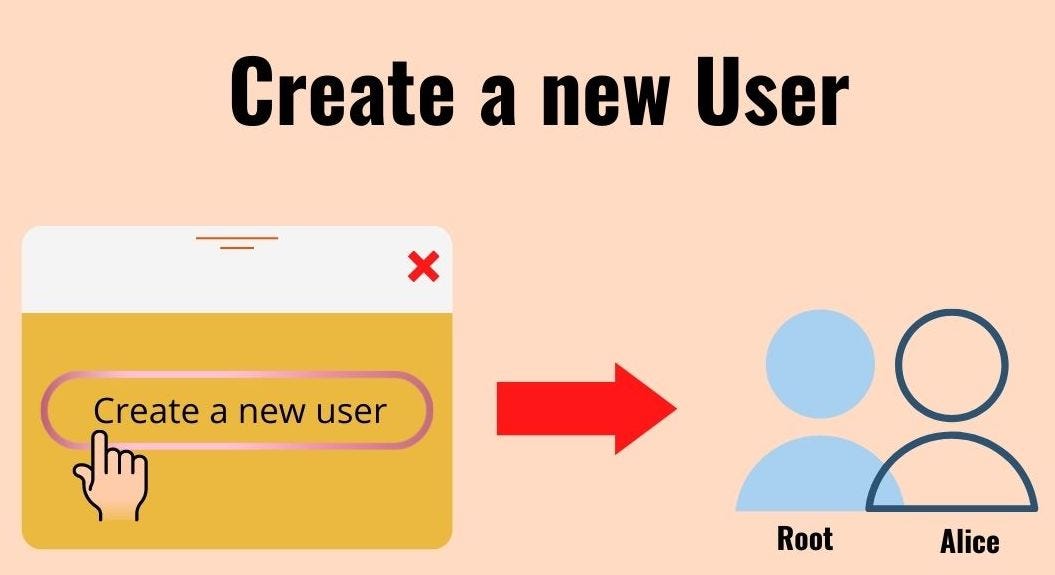
Creating a new User
If you are a habitual Windows user, you may be familiar with the Administrator account. If not, you should be. On Linux, we refer to it as a root account in a similar way. The root user’s capabilities are the same as those of an Administrator User in Windows, which means they have complete control over the system, including the ability to edit system settings, add users, determine their privileges, and much more.
In Linux based OS, root has the highest role. It can be used to perform all sorts of commands, and functionalities. This also includes modifying the system and the boot files. It just got scary really fast. If an adversary gets access to your machine, and all you have is the root user, the attacker, by default will get access to the root user. He can perform all sorts of actions from setting up rogue accounts to wiping your entire system settings. In order to prevent this behavior, you need to create a new user that doesn’t have the root permission So create a new user and do not provide it root privileges. Give it appropriate permission to run the services that you’ll be dealing with. If you want to start any service, use this user. This will ensure that even if the service gets hacked, and the attacker is able to get a reverse shell on the server, he’ll not be able to perform those actions that require root privileges.
- Disable Root SSH access
If the server is hosted on a cloud platform like Digital Ocean, AWS, etc. the only way you can connect to it is using SSH. You might think that this is secure, but not always. Consider the points below.
a) Ensure that the password is strong. Prefer a passphrase over a password.
b) Do not use sticky notes to write your passwords in. Use a password manager instead.
c) Disable Root SSH Access.
But why disable Root SSH access? Won’t this prevent you from connecting to the server itself? This is where the other user(s) comes into play. Disabling root SSH login will prevent any attacker from running a brute force attack against the server so that he can login as root. Also, this will ensure that even if your password is compromised, it’ll be of no use to the adversary. Ergo, disable root SSH Login and create a new user (as discussed in the point above) and set up SSH for the user.
Following are the steps to disable it.
First To do this action, you must be logged in as the root user (or have root level access). The sshd_config file, which contains the configuration information for SSH connections and accounts, can be edited. These commands should have to be executed in the terminal.
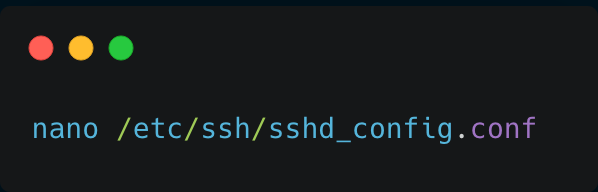
It will open the file, now you need to just disable the root login option, for that Scroll down till you see #PermitRootLogin
Change #PermitRootLogin yes to #PermitRootLogin no
#PermitRootLogin no
2. Changing the default permissions
By default, when a new user is created, a new directory is created for the user in the /home . For instance, if a new user with the name maya is created, then the default directory created for the user will be /home/maya
The default permissions for the files/folders inside the /home/maya directory would be wrx r-x r-x. It can easily be identified by running a simple command
ls -la
The listed permission will look like this.
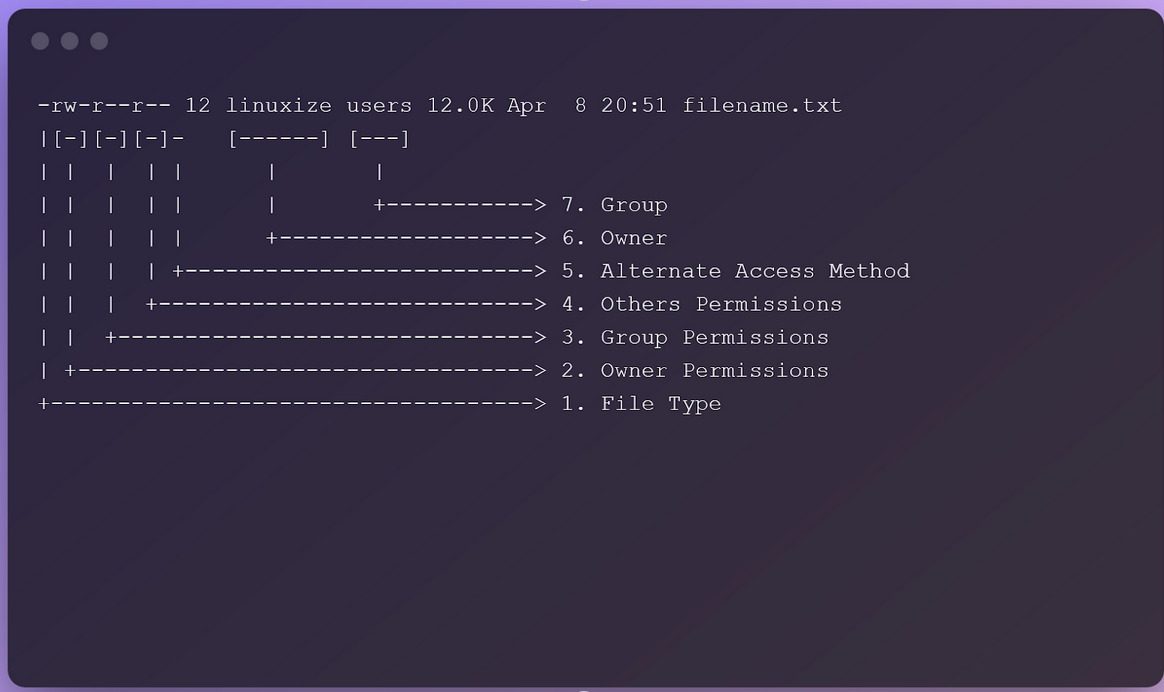
This indicates that, by default, maya will have all the read (r), write (w), and execute (x) permissions. If there are any other users in the same server, say raj, then raj might not be able to alter any file, but he can definitely read any file(s) in the /home/maya directory.
Same goes for maya. She can read any content lying in the /home/raj directory.
There are ways to change this. The first is the manual way. It is pretty tedious and time taking. This can be accomplished using the chmod command line utility.
Let’s look at how you can change from a file, so that proper permissions are provided to any user whose account gets newly created by the root user.
Note: You will need to be the root user (or need root level permissions) to perform this task.
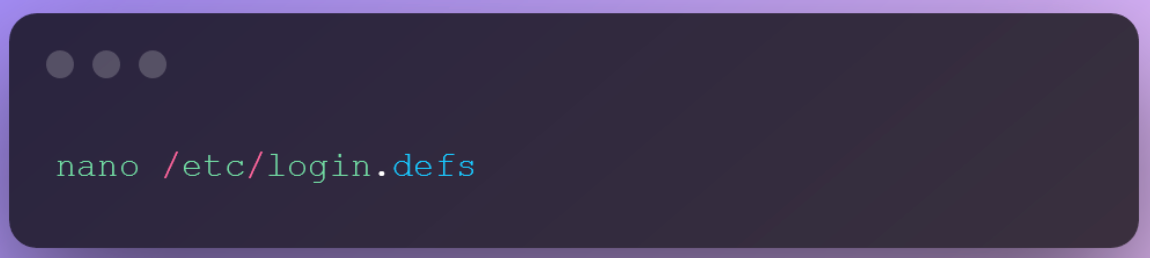
You will have to change the UMASK value in the /etc/login.defs file.
You’ll see that the value for UMASK has been set to 022. Change it to 077
So why we are assigning the numeric value while changing the permission, let’s understand this in brief
Depending on the format used, file permissions can be represented numerically or symbolically. The permission number can be made up of three or four digits, with the numbers ranging from 0 to 7 in the range.
When a three-digit number is used, the first digit reflects the permissions of the file’s owner, the second represents the permissions of the file’s group, and the third represents the permissions of the users
r (read) = 4
w (write) = 2
x (execute) = 1
no permissions = 0
In the case of a given user class, the permissions digit is the sum of the values of the permissions granted to users in that class.
In the permissions number, each digit can be a total of the numbers 4, 2, 1, and 0: for example,
0 (0+0+0) — No permission.
1 (0+0+1) — Only execute permission.
2 (0+2+0) — Only write permission.
3 (0+2+1) — Write and execute permissions.
4 (4+0+0) — Only read permission.
5 (4+0+1) — Read and execute permission.
6 (4+2+0) — Read and write permissions.
7 (4+2+1) — Read, write, and execute permission.
According to this definition, if the permission number is set to 750, the file’s owner has read, write, and execute permission, the file’s group has read and execute permission, and all other users have no permissions:
Owner: rwx=4+2+1=7
Group: r-x=4+0+1=5
Others: r-x=0+0+0=0
So now let’s change the value of UMASK to 077
UMASK 077
The next time a new user is created, the default permissions will be rwx——
So, only the owner of the file will be able to read, write and execute any file that is in his home directory and others will not be able to read, write or execute it.
3. Closing any unrequired port.
By default, when you create a server only port 22 will be open which is for the SSH and can be used by the user to establish communication with the server such as transferring files, creating users etc. Your work/project might require you to open additional ports like 80,443, 445, 8080, 8443, etc. It is quite common for us to forget to stop the services and close the ports that no longer support our cause/purpose.
To check the ports and services running on them, you can use netstat -l or ss –l commands to check for the ports that are open, you can also use the nmap to scan the port on the system.
Also find which ports/services are open to the public and which are available locally. It would not take a mistake to turn into a nightmare as you might expose some of the unwanted services to the internet and attackers might take advantage of those to intrude into your system.
For instance, MongoDB is a NoSQL database server. By default, it listens on port 27001 and does not require any credentials to log in. It would be really devastating to find that instead of making it available locally, it was open to the public. Since it doesn’t require any credentials to login, the attacker can not only dump the data but also tamper with it.
4. Password Requirements
You might have seen websites slapping you with warnings that your passwords don’t meet the required criteria. This could be due to the insufficient password length, no use of special characters, etc. But many might not know that this is also possible to set up in Linux and Windows Environments. You, as a root user, can set up password complexity, length and expiration time. In order to set them up, you need to modify the login.defs file. There are a couple of attributes which need to be modified.
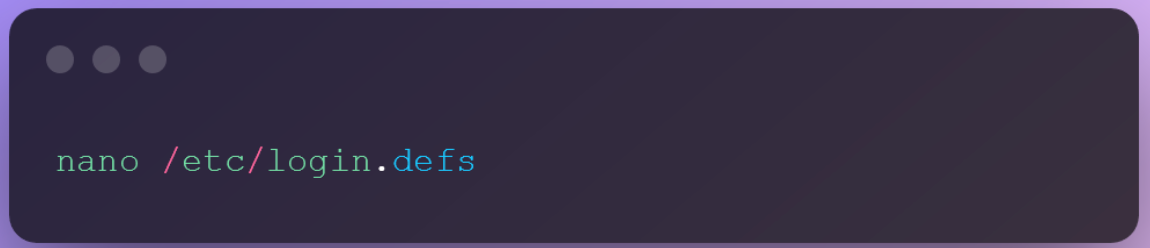
Scroll Down till you see these attributes,
- PASS_MAX_DAYS
- PASS_MIN_DAYS
- PASS_WARN_AGE
PASS_MAX_DAYS is the max number of days a password may be used. By default, it is 99999. If you are in a corporate, enterprise environment then you can change this value as per your company’s policy. Otherwise, the recommended days after which the password should be changed is 90 days.
PASS_MIN_DAYS tells the minimum number of days before you are allowed to change the password. By default, it is 0 but you can change it as per your and your company’s requirements.
PASS_WARN_AGE is used to warn the user to change the password. By default, it is set to 7 and will be used to warn the user 7 days before the PASS_MAX_DAYS to change it.
If you also want to set the minimum length for the password, you can easily do that by modifying the common-password file in the Linux. Open the file using nano by using this command.
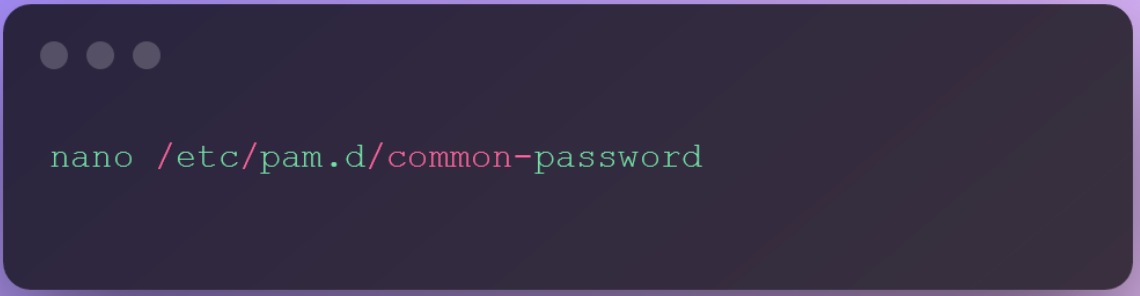
Visit the line that looks similar to the line provided below:
password [success=1 default=ignore] pam_unix.so obscure sha512
As per your company policies you can add the number of characters that you want to set. I’ll be keeping it 8. All that is to be done is to add minlen 8 at the end of the line. So that it looks similar to the line provided below:
password [success=1 default=ignore] pam_unix.so obscure sha512 minlen 8
Conclusion
We humans are the weakest links when it comes to cybersecurity/cyberattack. Anything that is connected to the internet is vulnerable or may get vulnerable in the future. It is our responsibility to ensure that our entities remain secure from adversaries and are not exploited by them. It is recommended that you do check the log files of SSH, your web-server or that of any other service that is running on the system to see any anomalous activities.